How to Configure Juniper Routers with NETCONF via XML RPCs
This post is part two of a multi-part series on the NETCONF protocol. Today will detail the steps required to configure a Junos device through the NETCONF interface using raw XML Remote Procedure Calls.
Understanding NETCONF
If you haven't already, check out part one of our NETCONF series.
This post contains prerequisite information such as how to establish a NETCONF session to a juniper device over SSH and the basics of the NETCONF protocol.
Today's Lab
For today's tutorial, let's use the configuration from last weeks post on VRRP. The configuration we applied to our vSRX is shown below.
set interfaces ge-0/0/1 unit 0 family inet address 10.0.0.3/24 vrrp-group 1 virtual-address 10.0.0.1
set interfaces ge-0/0/1 unit 0 family inet address 10.0.0.3/24 vrrp-group 1 priority 50
set interfaces ge-0/0/1 unit 0 family inet address 10.0.0.3/24 vrrp-group 1 accept-data
Now, imagine we want to apply the above VRRP configuration using a NETCONF RPC as opposed to a CLI input. To carry out this goal, we'll first need to get the configuration structure of our desired config in the XML format.
How to find the router's data model
We can do this in a couple of ways. The easiest way is to take a router which already contains our desired config and then run the operational command as shown below. As an alternative, the configuration structure can also be obtained by looking at the YANG models of your Juniper device.
user@vSRX> show configuration interfaces ge-0/0/1 | display xml
<rpc-reply xmlns:junos="http://xml.juniper.net/junos/15.1X49/junos">
  <configuration junos:commit-seconds="1564283704" junos:commit-localtime="2019-07-28 03:15:04 UTC" junos:commit-user="user">
    <interfaces>
      <interface>
        <name>ge-0/0/1</name>
        <unit>
          <name>0</name>
          <family>
            <inet>
              <address>
                <name>10.0.0.3/24</name>
                <vrrp-group>
                  <name>1</name>
                  <virtual-address>10.0.0.1</virtual-address>
                  <priority>50</priority>
                  <accept-data />
                </vrrp-group>
              </address>
            </inet>
          </family>
        </unit>
      </interface>
    </interfaces>
  </configuration>
  <cli>
    <banner />
  </cli>
</rpc-reply>
Once you have run this command, copy and paste the configuration block into a text editor of your choice. You can also remove the metadata from the configuration tag.
<configuration>
  <interfaces>
    <interface>
      <name>ge-0/0/1</name>
      <unit>
        <name>0</name>
        <family>
          <inet>
            <address>
              <name>10.0.0.3/24</name>
              <vrrp-group>
                <name>1</name>
                <virtual-address>10.0.0.1</virtual-address>
                <priority>50</priority>
                <accept-data />
              </vrrp-group>
            </address>
          </inet>
        </family>
      </unit>
    </interface>
  </interfaces>
</configuration>
How to connect to the router using NETCONF
We now have the information required to get started on our NETCONF session. As we did in part one, establish a NETCONF session with the command below.
[user@centos-server ~]# ssh user@192.168.1.94 -p 830 -s netconfHow to send the edit-config RPC
We'll now initiate a Remote Procedure Call to edit the candidate configuration using the block below. This request can be used for any config by simply replacing the child data inside the configuration element.
<rpc>
  <edit-config>
    <target>
      <candidate />
    </target>
    <default-operation>merge</default-operation>
    <config>
      <configuration>
        <interfaces>
          <interface>
            <name>ge-0/0/1</name>
            <unit>
              <name>0</name>
              <family>
                <inet>
                  <address>
                    <name>10.0.0.3/24</name>
                    <vrrp-group>
                      <name>1</name>
                      <virtual-address>10.0.0.1</virtual-address>
                      <priority>50</priority>
                      <accept-data />
                    </vrrp-group>
                  </address>
                </inet>
              </family>
            </unit>
          </interface>
        </interfaces>
      </configuration>
    </config>
  </edit-config>
</rpc>
]]>]]>
You'll notice that we explicitly set the default-operation to merge. This tag isn't necessary as the default value is merge, but it is useful to remind us that we can also use the value replace when appropriate.
After executing the RPC, you should receive a response similar to ours displayed below.
<rpc-reply xmlns="urn:ietf:params:xml:ns:netconf:base:1.0" xmlns:junos="http://xml.juniper.net/junos/15.1X49/junos">
  <ok/>
</rpc-reply>
]]>]]>
How to verify the candidate config
Note that at this point we have only edited the candidate configuration - no changes have been committed to the device yet. To get a view of the configuration waiting to be committed run the RPC below. This RPC is the equivalent of running the show | compare command.
<rpc>
  <get-configuration compare="rollback" database="candidate" />
</rpc>
]]>]]>
Next, we would like to check that our candidate config is valid with an RPC equivalent to commit check. We may do so as shown below. An RPC reply containing the element <ok /> should be returned.
<rpc>
  <validate>
    <source>
      <candidate/>
    </source>
  </validate>
</rpc>
]]>]]>
How to commit the candidate config
Finally, we may commit the candidate configuration.
<rpc>
  <commit>
    <confirmed/>
  </commit>
</rpc>
]]>]]>
If you see a reply like the one below you have successfully configured your device via NETCONF!
<rpc-reply xmlns="urn:ietf:params:xml:ns:netconf:base:1.0" xmlns:junos="http://xml.juniper.net/junos/15.1X49/junos">
  <ok/>
</rpc-reply>
]]>]]>
Hopefully, these instructions helped your understanding of device configuration via NETCONF. If you have any questions, feel free to leave a comment beneath the post and we'll do our best to help.
Ultra Config Generator
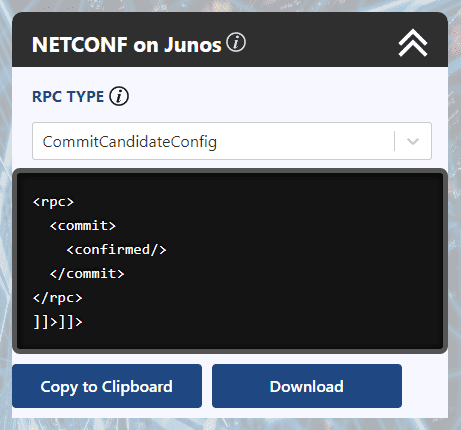
You can download a template of the configuration discussed above and import it into your Ultra Config Generator instance. A screenshot of the NETCONF template in action is shown for illustration.
Download: netconf-on-junos-2019-07-28.json
Figure 1: UCG NETCONF Template for Junos
If you haven't heard of Ultra Config Generator, I would highly recommend you check it out. We designed the product to allow network engineers to generate and automate network configuration in a highly flexible, efficient and elegant manner. Our users love the application and I hope that you will too.
Take care until next time!
Ultra Config
JOIN THE DISCUSSION
Subscribe to the Blog
Subscribe now and never miss a new post!
Success! You'll now receive emails when new blogs are posted.
